How to setup a custom domain?
This documentation shows how to set up a custom domain for your status page.
Background
Custom domain is a feature that is used when status page address needs to match with your company’s website address. In this demo, we will use our demo domain examplecompany.xyz, and want to add custom domain status.examplecompany.xyz for our status page.
Step 1 – Configure DNS
The first step is to update DNS settings for the domain, in this demo for the domain examplecompany.xyz. The basic idea is to point custom domain to AdminLabs’ domain status.adminlabs.com. Because there are a countless amount of DNS management tools, we can’t have instructions on all of them. However, you should get the know-how based on the following examples.
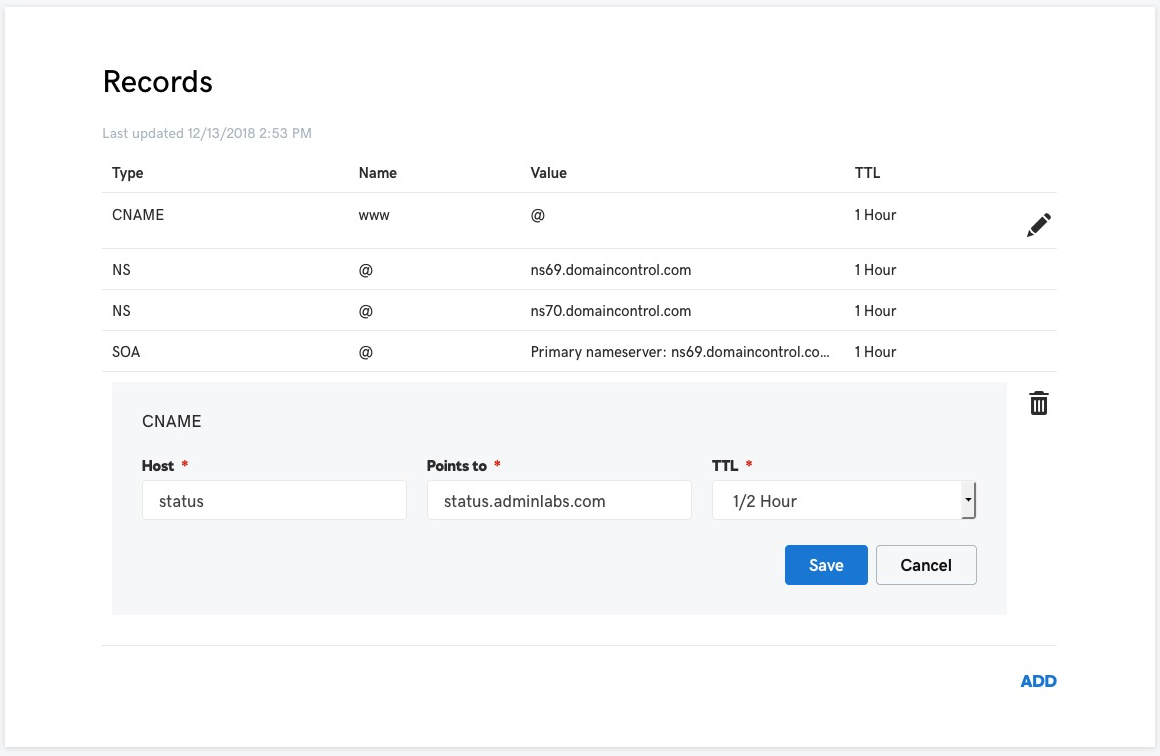
Example – GoDaddy
- Login to your GoDaddy account
- Navigate to Domain manager / Manage Zones
- Find your domain
- Insert a new CNAME record – please see the example image
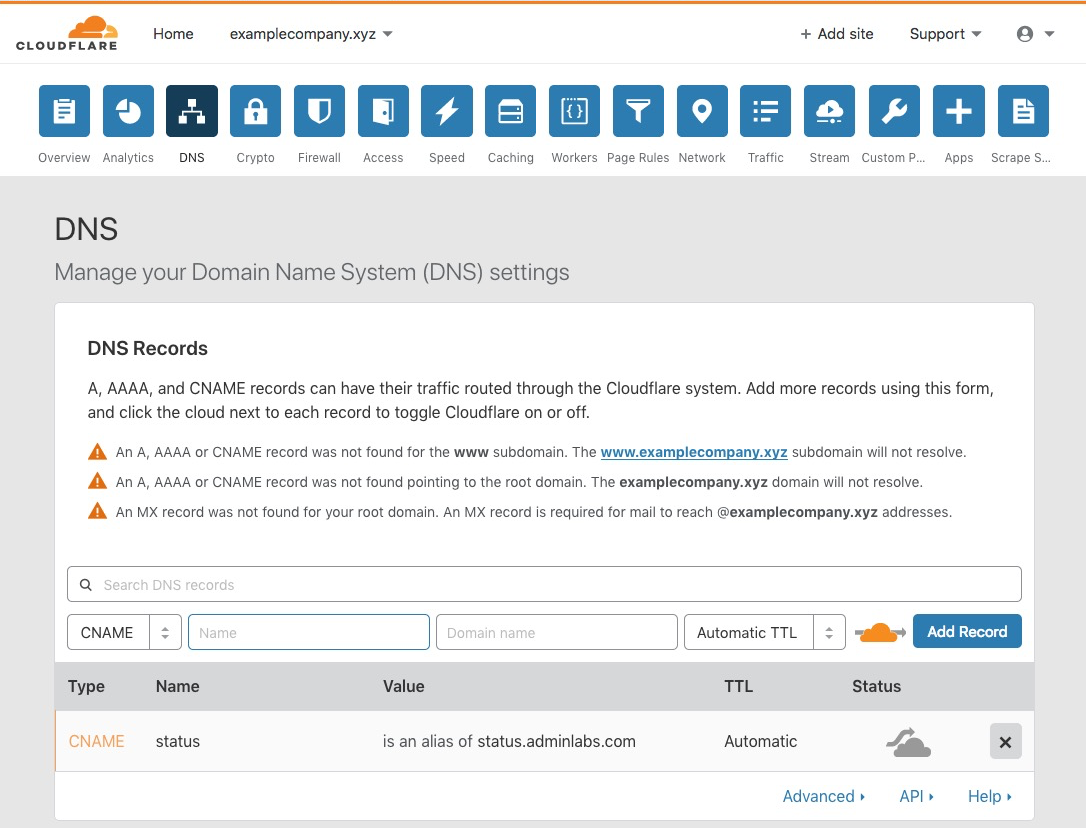
Example – Cloudflare
- Login to your Cloudflare account
- Select your domain
- Select tab DNS
- Insert a new CNAME record – please see the example image
Step 2 – Update the domain for the status page
The second, and the last thing is to update the custom domain for the status page:
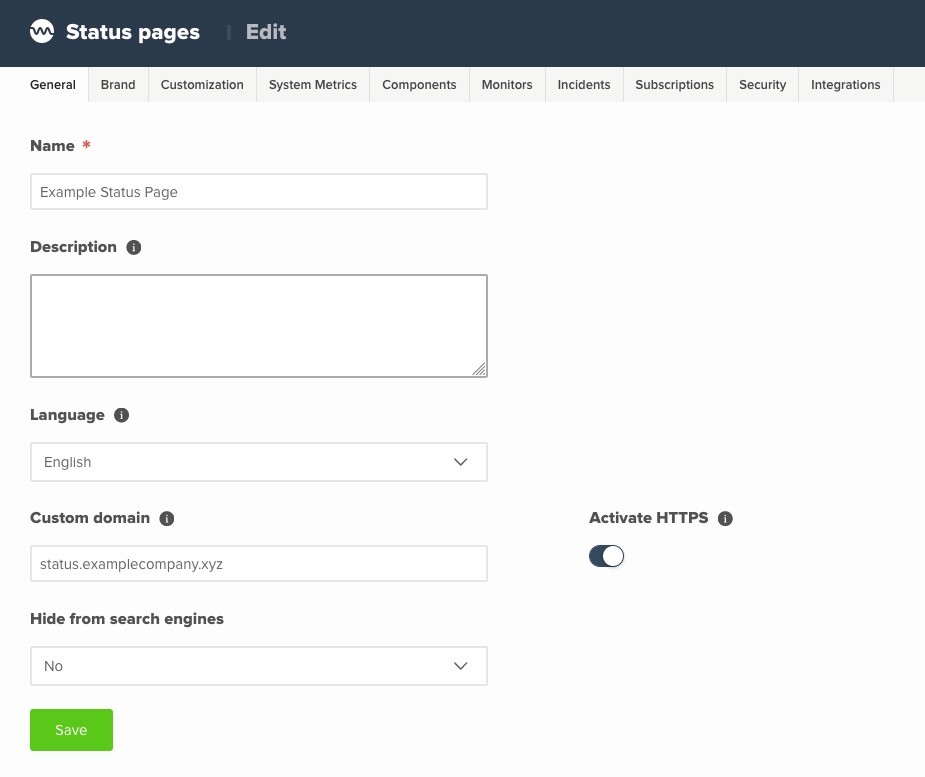
- Login to AdminLabs Dashboard
- Navigate to Status Pages / Manage
- Open your status page in edit mode
- Insert the domain status.examplecompany.x into the field Custom domain and save changes – please see the example image
Step 3 – Test it
The last step is to validate the custom domain. In this demo that can be done by navigation to the address http://status.examplecompany.xyz.