How to setup a custom email domain?
This documentation shows how to set up a custom email domain for your status page.
Background
Custom email domain is a feature that makes it possible to send status page notifications from your company’s domain. In this demo, we will use our demo domain examplecompany.xyz, and will use it for status page notifications. There are few technics that are widely used for preventing spammers from getting their messages through. Because it is crucial to get your status page notifications delivered, actions are needed.
Step 1 – SPF / Configure DNS
The first step is to update DNS settings for the domain, in this demo for the domain examplecompany.xyz. The basic idea is to allow AdminLabs to send emails for the domain examplecompany.xyz. Read more about sender policy framework (SPF).
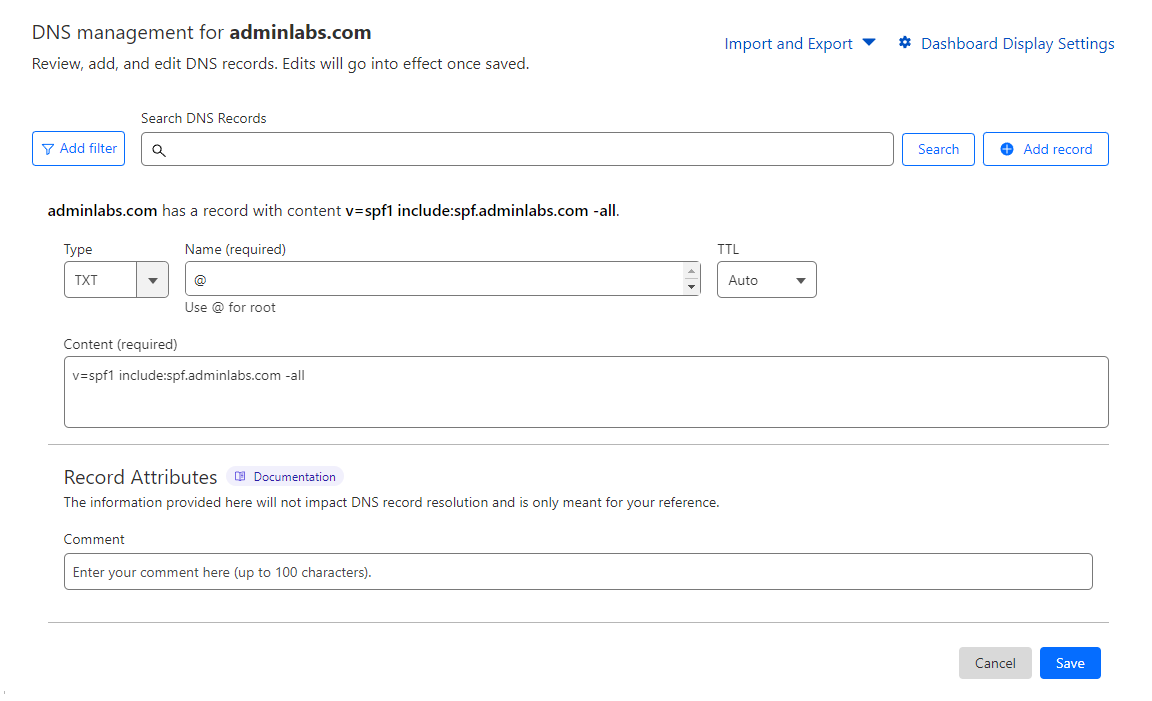
Example – Cloudflare
- Login to your Cloudflare account.
- Select the domain you are using in AdminLabs.
- Select the DNS tab.
- Insert a new TXT record (or update an existing one.)
- The value should be something like
v=spf1 include:spf.adminlabs.com -all. Usually, you’ll have other allowed senders as well. In these cases you need to adapt the instructions.
Step 2 – Update the email domain for the status page
The second thing is to update the custom domain for the status page:
- Login to AdminLabs Dashboard.
- Navigate to Status Pages / Manage.
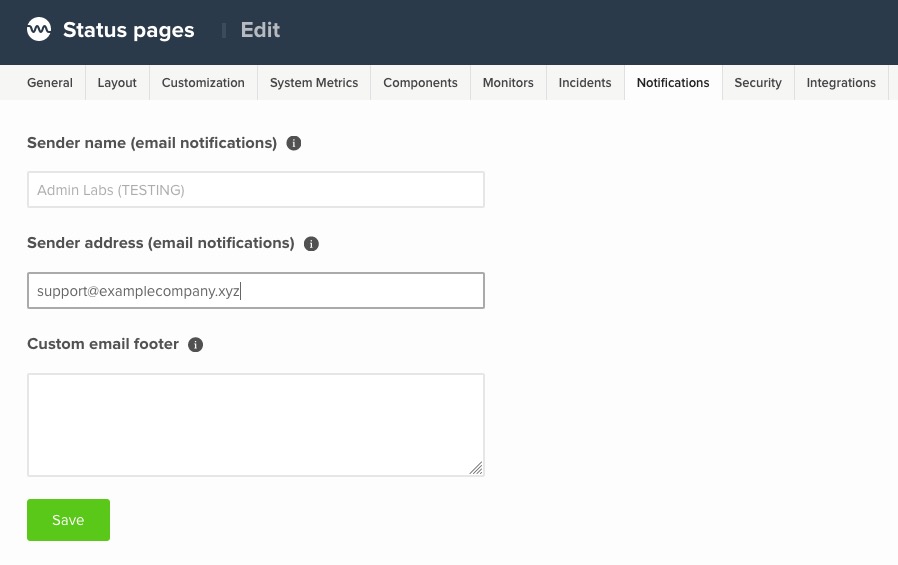
- Open your status page in edit mode.
- Open the Notifications.
- Fill out the Sender address (email notifications) field with the address you want the emails to be sent as e.g: support@examplecompany.xyz. You may also want to fill out the Sender name field.
Step 3 – Test it
The last step is to validate the custom email domain. That can be done with status page’s testing tool:
- Login to AdminLabs Dashboard.
- Navigate to Status Pages / Manage.
- Select Status Page tools from the tools.